So last week Unity released a new LEGO® Microgame, and I said in my last blog post that I was going to try it out and probably make a post about it “tomorrow”. That “tomorrow” would have been last Thursday, and it is now the following Wednesday. What took me so long? Well, part of the delay was because I’m just starting a new job, and that’s been taking up much of my time the last few days—though not as much time as it should have taken up, given that I spent a lot of time on the LEGO Microgame that I should have been spending preparing for the job. But even without the new job, I wouldn’t have been able to make this post quite that quickly.
See, I thought it would only take me a day to get through the Microgame and see what it had to offer. And I did in fact get through the main tutorials in one day. But I thought I should also finish the mods before I made my post, and, well, it was in doing the mods that I got seriously sidetracked, and ended up going down a LEGO rabbit hole. Of course, I’m sure the main reason the LEGO company allowed Unity to use its intellectual property for this Microgame was in the hopes of getting more people interested in and involved with LEGOs, and so all I can say is… well played.
Well, it’s not entirely true to say that the Microgame got me interested in LEGOs. I’d always been interested in LEGOs. LEGOs were one of my favorite toys as a child; I would seldom if ever follow the instructions in the sets and build what was shown on the boxes, but would create my own constructions, mazes and castles with moving parts and hinged rooms. As an adult, I bought one or two boxes of assorted LEGOs on eBay years ago, and I brought LEGOs with me on my job as a studio teacher to let the kids on set play with when they weren’t working. I guess I’ve always sort of been a fan of LEGOs, to a degree. Just… not to the degree where I built virtual LEGO models with special CAD programs; or spent time on the LEGO wiki (of course there’s a LEGO wiki, and of course it’s called Brickipedia); or learned all the terminology and knew the difference between bricks, plates, tiles, and brackets. At least, not until now.
But I’m getting ahead of things. Let’s start by talking about the Microgame, and the main tutorials that it contains. Now, I should stress at the start that this Microgame is still in beta release. I’m going to mention some issues that I ran into with the Microgame, but given that it’s in beta it’s not surprising that such issues exist, and they’ll probably be fixed in the final release. (Plus, well, some of those issues were probably just me being stupid.)
This Microgame being based on a licensed property, of course, the player is first met with a bunch of terms and conditions for use of these LEGO assets. The assets couldn’t be used for commercial purposes; they couldn’t be used in a way that would “infringe any third-party copyrighted material”; all LEGO designs must be the user’s own; and so on. The most interesting bit of the terms and conditions was a requirement that any LEGO designs made with these assets “must be constructible: Any person must be able to actually build your Designs using unforced, proper clutch connections.” I guess the LEGO Group doesn’t want unconstructible designs in games potentially misleading people about what can be done with their product, or encouraging them to use it in a way that could damage the parts… huh.
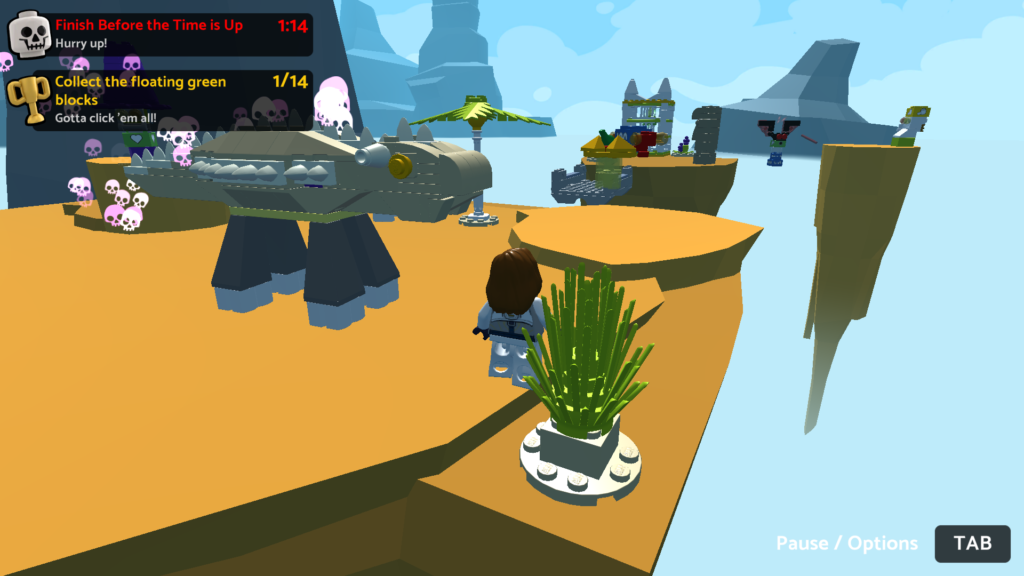
So, anyway, the main tutorial level in the Microgame has you controlling an astronaut as she walks and jumps her way across a series floating islands, trying to reach a goal at the top—except that as it stands, before you complete the tutorial, the goal is actually impossible to reach. Some new gizmos have been added to work with LEGO bricks, most notably a tool window that lets the user turn on and off Brick Building mode (when it’s on, you can’t move objects with the usual gizmos, but can snap LEGO bricks into place), and to choose between Single Brick Selection (you select only the brick you click on) or Connected Brick Selection (you select the brick you click on and all bricks connected to it). There are seven main parts to the tutorial, which I’ll cover in order:
Get started
The first tutorial just has you playtest the level, and then change the player’s speed. It’s a small change—just changing a variable from 12 to 13—but the point is to get the user used to the Unity interface and to using the Inspector, and it serves that purpose well enough.
Add a platform
The floating island that contains the player’s goal is too far away from the other islands for the player to reach it. In this tutorial, the user fixes that by adding a floating platform between the islands. The point of this tutorial is to give the user experience with the Project window, putting in instances of prefabs, and moving and rotating objects in the Scene window, and again it serves that purpose well enough.
It was in this tutorial, though, that I ran into my first issue. When I tried to rotate the platform, each individual piece of the platform rotated rather than the platform as a whole. The tutorial didn’t register the platform as having been rotated, so I couldn’t progress. I finally exited out of the tutorial, restarted it, and added another platform, and this time it worked as I expected. I eventually realized that if I clicked on a LEGO object in the Scene window when Connected Brick Selection was on, all the individual pieces connected to the brick I clicked on were selected, but not the parent object holding them; to select that parent object, I had to click on the object in the Hierarchy. This isn’t really surprising behavior, and is simple enough to get used to, but maybe could have used a bit more documentation.
Activate the elevator
So with the platform in place, the player can now get to that final island—but still can’t get to the goal, which is in an elevated area on the final island that the player is unable to reach. There’s an elevator on the island, but it’s not currently functioning—in this tutorial, the user corrects that. The point of this tutorial is to introduce the user to another of the unique features of this Microgame, the “LEGO Behaviour Bricks” (shaped like 2 x 2 LEGO bricks) that can cause certain events or actions to happen. In this case, the user attaches an Elevator brick to the elevator to make it go up and down, and a Touch Trigger brick to make it turn on when the player touches it.
Change the win conditions
So by default, the player wins the level on reaching the goal. But there are also collectible pickups along the way. In this tutorial, the player changes the conditions to make the player win by collecting all the pickups, rather than by reaching the win block. This tutorial doesn’t really introduce any brand new concepts, but does give the user more practice with LEGO Behaviour Bricks and with using the inspector.
Add an enemy
In the unmodified version of the level before the player goes through the tutorials, the only actual threat to the player is falling off the islands. In this tutorial, the user adds an enemy—by default, a LEGO model the tutorial calls a Galo Bird, though there’s nothing to stop the user from putting in a different enemy if they want to. Again, no radically new concepts here, but it does give the user a chance to try out some new LEGO Behaviour Bricks.
Customize your game
The island with the Win block on it isn’t the only one that’s initially inaccessible. In this tutorial, the user gives the player a way to get to another island that they initially couldn’t get to. This involves blowing up an electric fence that would otherwise bar the player’s way. Yet again, the main point of this tutorial seems to be to introduce the player to new kinds of LEGO Behaviour Bricks.
Build and publish
Finally, having completed all the other tutorials, in this tutorial the player publishes their game online as a WebGL project, using the Publish menu option that the Micrograms implement. Here I think there was something of a glitch—I seem to recall other Microgames giving the user a chance to name their game, but in this case no such option was provided, so the game was published as “untitled”. Oh well.
Anyway, that does it for the main tutorial. But there are also three additional Beginner Mods that the user is encouraged to try next. And… okay, here’s where I maybe went off the rails a bit. I tackled the mods in the order of what I thought would be the simplest to complete to the hardest, given what specifically I wanted to do with them. And, well, here are the mods, and what I ended up doing with them:
Create a locked area
In this mod, the user added a cage, and a control panel to open it. This mod once again just introduced the player to some LEGO Behaviour Bricks that hadn’t been used in any of the tutorials. The suggested “extra credit” tasks included adding items to the cage (I put in another pickup) and putting in a “completely custom locked area” elsewhere (I put an electric fence around the elevator, with a control panel to move it out of the way placed on a ledge off to the side).
(One minor nitpick: The instructions to this mod state that “‘FogPlane’, ‘Rocks’, ‘Clouds’ and ‘Mountains’ are all the children of Environment”. In fact, “FogPlane”, “Rocks”, and “Mountains” are children of Environment, but—as shown in the image just above the paragraph where the text appears — there’s no “Clouds”. Also, there’s a typo later on, where the text leaves out the “to” in “you need to configure”—I guess “you need configure” may not be technically grammatically incorrect, but it strikes a weird tone at odds with the rest of the text. Okay, I guess that’s two minor nitpicks.)
So, this tutorial was pretty straightforward. The next tutorial is where this really turned into a time sink for me…
Build your own enemy
Yes, in this mod, the user was encouraged to build their own enemy, complete with appropriate LEGO Behaviour Bricks to make the enemy… well, do something. And yes, building things out of LEGOs is the best part of using them, so this mod seemed like it could really get fun.
(Okay, another minor nitpick: The instructions say at one point “If you’ve accidentally placed your brick, select the Move brick and drag it from the cage door to try again.” This bit of text was clearly copied from the “Create a locked area” mod, but the writers forgot to take out the reference to the cage door that doesn’t apply to this mo.)
So what building materials was the user given? Well, there were two prefab brick collections, one called “Starter Bricks” and one called “Cool Bricks”, that the player could use. And there were some interesting pieces included there, and I guess it would have been possible to come up with a decent enemy using only the bricks in those sets. But I wanted more. It occurred to me that some of the other prefabs in the Microgame included bricks that weren’t in those brick collections. Could I use those bricks too? Yep. All I had to do was make sure I was in Single Brick Selection mode, select the brick I wanted to use, duplicate it, and drag it out of its original parent object in the hierarchy. Voilà—a wealth of new bricks to build with.
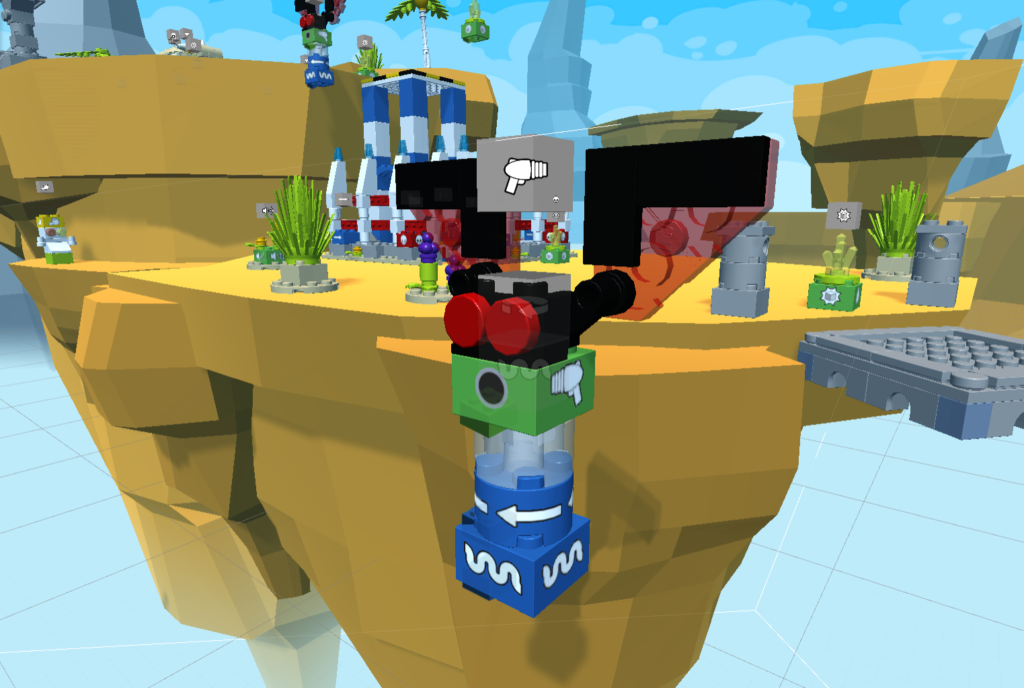
But I still wasn’t finding quite what I wanted. I wanted to make a sort of a simple bat enemy—nothing too complicated, but I couldn’t find a piece I thought was really suitable to use for the wings. But I ended up finding one more place to draw pieces from…
I had been thinking as I played through the tutorial that this seemed like there had been a lot of work done for just one Microgame, implementing all the LEGO bricks and the mechanisms for connecting them. Was there more planned for some of these assets? Was this a harbinger of further resources for making LEGO games in Unity? Well, I found what seemed to point toward an answer to that question when I noticed a package called “LEGO Model Importer”. (There’s also another package called “LEGO Materials”, but it’s less directly relevant to what I was doing, and I don’t really have anything more to say about it.) This package wasn’t used at all in the Microgame (that is, no part of the tutorials or mods pointed it out to the user or asked them to use it; it almost certainly had been used to create the Microgame), but it was there—and, as a Unity package fully accessible through the Unity Package Manager, it could easily be used in other Unity games as well. So the tools were there to use LEGOs in Unity outside the Microgame, even if no one had called attention to them. (Yet?)
The LEGO Model Importer package also added an “Import Model” option to the editor menu, and out of curiosity I clicked on that—to find that apparently the Microgame had come with one sample model already provided and importable, an LDraw project called “Elephant.ldr”. (If you don’t know what an LDraw project is, well, neither did I at the time; I’ll get to that in a bit.) I imported the model, and it was indeed an elephant. A pink elephant, in a blue hat.
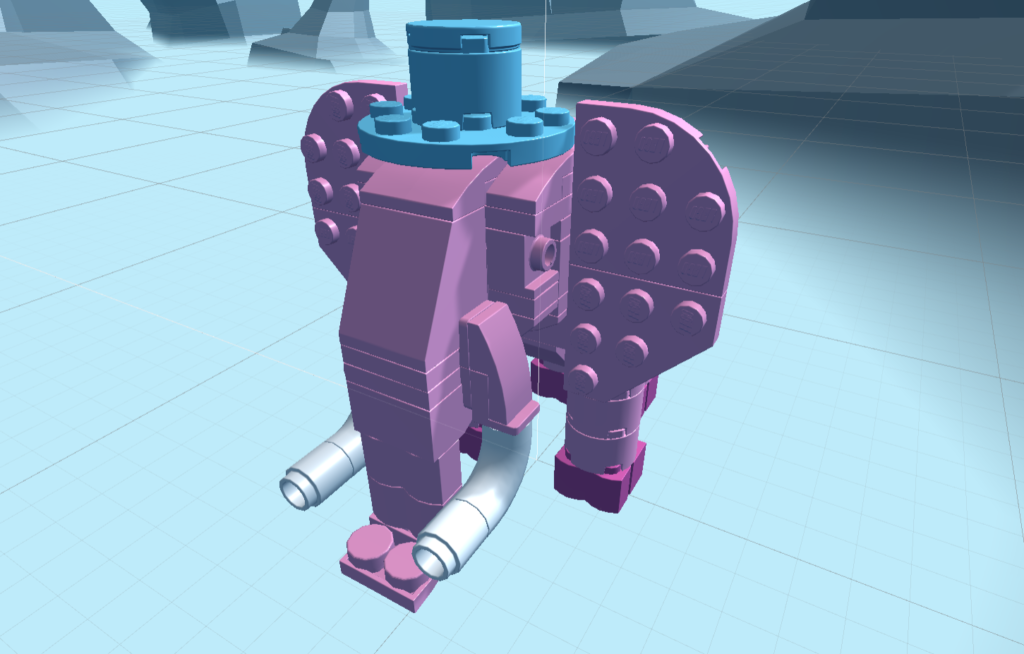
Moreover, the lower part of its ear seemed like it would be perfectly suitable for my bat enemy. So I copied out that part, changed its color, and… I had my enemy. It’s a bat that rotates and bobs up and down and shoots lasers, and I called it a “laser bat” because, well, who’s going to stop me? I had a bit of an issue at first in that the part of the bat’s wing that had been taken from the elephant’s ear didn’t move with the rest of the model but remained in its original position when the bat bobbed and rotated, but looking at the piece in the Inspector I saw that it was marked Static; I just unchecked that and all was well.
And that would be that… except that, once again, the mod included some suggested “extra credit” tasks, and one of them was to “Create different enemies for different parts of the level”. So if I really wanted to completely finish the Microgame, including all mods and all “extra credit”—which I did—I’d have to create a second enemy.
I’d already created one enemy; how hard would it be to create another? Well, it probably wouldn’t have been hard at all, had I not, as usual, gotten kind of carried away.
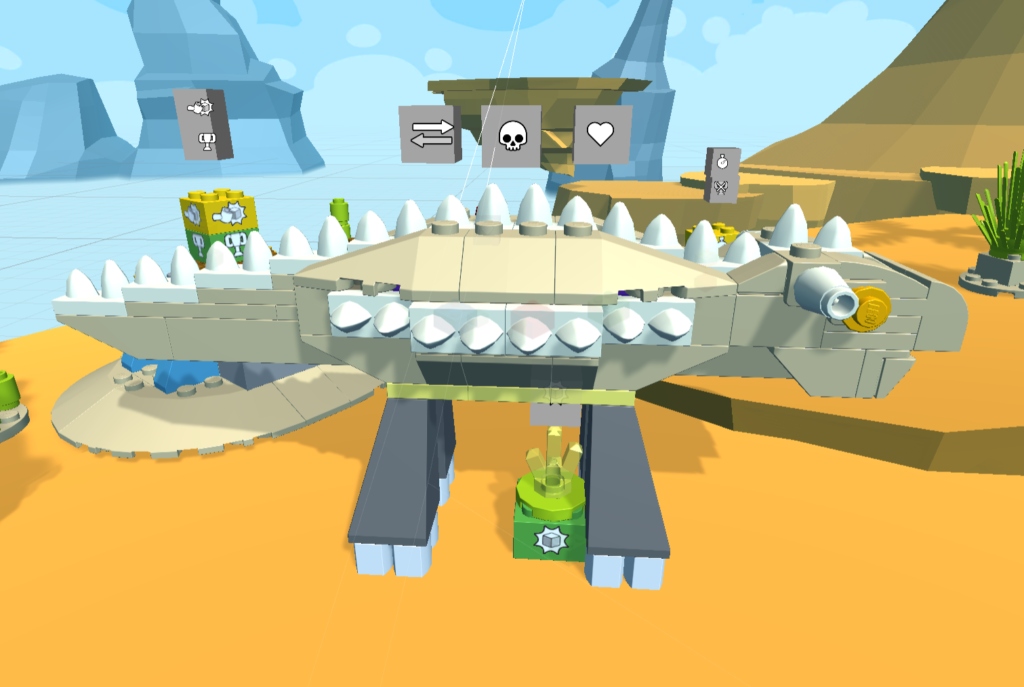
For the second enemy, I figured I’d build some big spiky thing, sort of reminiscent of an ankylosaur. I salvaged some useful pieces from some of the prefabs that came with the Microgame, and managed to put together a body and tail I was reasonably happy with. It was sometimes a bit difficult to get the pieces to snap into place where I wanted them, but I managed with some effort to get it all assembled. Now, for the head, there were a few pieces I wanted to use from the elephant. And here’s where I ran into problems.
I’d been running into an issue before where sometimes I was suddenly unable to move pieces. If I clicked on a piece, it would be surrounded by a red outline, but the move gizmos wouldn’t appear—I could move it by changing its position coordinates in the Inspector, but not directly in the Scene view. If I kept clicking around and trying things, the issue would eventually be reversed and I would be able to move the piece normally again, but I wasn’t able to figure out exactly what I’d done to fix it. After some time, I think I did arrive at the answer; it may be that I was in Brick Building mode and didn’t realize it, and wasn’t trying to move the piece near another brick.
But for the two pieces I wanted to use from the elephant (for the record, they were piece 11477, “slope, curved, no studs”; and piece 36841, “bracket 1 x 1 – 1 x 1”), I was stuck. I couldn’t move them at all, whether I was in Brick Building mode or not. I had managed to duplicate them, move the duplicates some distance from the elephant, and then remove them in the hierarchy from the elephant object, but now they stubbornly refused to be moved any further; they were fixed in position, resisting any attempt to be attached to my model. After struggling with this matter for some time and trying to find a solution, I finally decided to make the model another way. I’d seen that I could import models created externally, and it wasn’t hard to find applications that could be used to do that—there were a number of free CAD applications specifically designed to create LEGO models. The LDraw format that the elephant file had been in was ultimately named after one such application, though that application itself was very old and no longer in use, and “LDraw” now more usually referred to the file format it used that had become a common standard, or to a suite of tools that used that format. I decided not to go with those tools, however, but with a different program, Bricklink Studio.
Of course, if I was now creating the model in an external program, that meant I was no longer limited to using the pieces that already existed in the Microgame; the Studio files included a huge collection of LEGO pieces, and I could use any of them I wanted. Still, I decided I would limit myself to the pieces that would have been available had I not used Studio, both as sort of a personal challenge and to avoid getting too sidetracked browsing the vast piece catalogue. I put together the head in Studio the way I’d wanted it, saved it, and went to import it into the Microgame.
And when I did this, I was presented with an option to import the model as Static or Dynamic. Wait a minute—I remembered my issue with the bat’s wing, and I thought I remembered having the same options when I imported the elephant. Had I imported the elephant as Static, and if so, would it have worked better had I implemented it as Dynamic? I forewent importing my new model for now, and instead tried to reimport the elephant, this time being sure to choose to import it as Dynamic. Sure enough, now I could copy and move any pieces from it with impunity, and I ended up building the head directly in Unity after all and not using the model I’d built in Studio.
So why hadn’t I have the same trouble using the other part from the elephant for the bat’s wing? I did eventually have the issue of its not following the bat’s movement, but not until after I had put it all together. I’m not sure, but I think in the case of the bat I hadn’t removed that piece from being a child of the elephant until it was already in place attached to the other pieces of the bat, while the pieces I wanted to use for my other enemy I’d removed from the elephant before I’d moved them into place. Whatever; I had them where I wanted now, and I had my second enemy, which I decided to call the “jabosaur”, despite this being a very silly name.
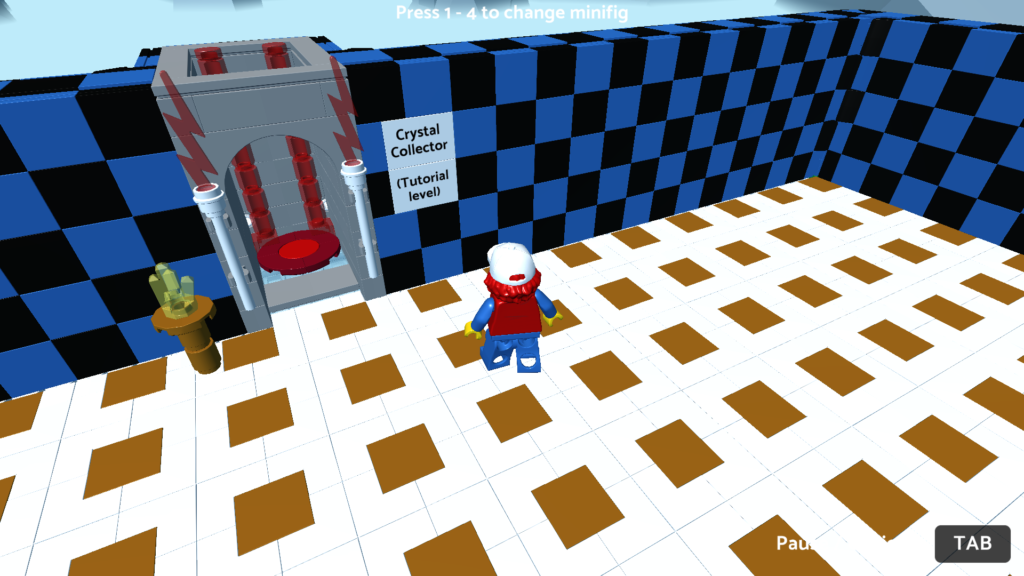
Change the player Minifig
I said I’d been tackling the mods in order from least to most complicated… but changing the player Minifig seems like it shouldn’t be complicated at all. Much less so than building a whole new model. Why did I save this one for last?
Well, because based on some things I’d found in the Microgame, I’d decided if I was going to change the player Minifig it was going to be in conjunction with some other things.
See, I’d happened to look in the Scene folder in the Project window, and found that the Microgame had come with four extra Minigames that didn’t seem to be documented anywhere. They were:
- Cannonball Bingo—Win by staying alive for thirty seconds as a cannon rains down cannonballs around you, destroying platforms and limiting the places you can stand.
- The Evil Machine–Collect five pickups to destroy an evil machine, avoiding the machine’s deadly arms in the process.
- Pandamonium–Collect five fruit from the trees as a panda throws spears at you—the trick is that the get the fruit you have to get the panda to destroy the trees. (The goal listed in the game says you have to “bamboozle the panda”, which I have to say is a clever pun.)
- Pirate Plunder–Aim a cannon to destroy and loot three treasure chests.
I tried each of the minigames, and I have to admit that “Pirate Plunder” was the only one I won, though I didn’t spend much time on the games and didn’t retry them after I lost; “Pirate Plunder” was the only one that didn’t have a losing condition other than falling off a platform.
Anyway, I had the thought of creating in my own build of the game a way for the player to access either these minigames or the main tutorial level. Maybe creating a lobby that could teleport the player to the level of their choice. And that would be a good place to incorporate the changing of the Minifig, too. In fact, rather than selecting a specific Minifig for the player, I decided I’d select a starting Minifig at random, and give the player the option to change to different Minifigs if they wanted. I had the thought that maybe in the future I’d even create some new minigames of my own, and let the player access those from the lobby as well.
So, yeah, this was going to turn into something very involved, especially since I decided to build the lobby from scratch in Studio—and this time I wasn’t going to limit my self to pieces that were included in the Microgame. I created four modular pieces for the lobby: one for a floor section, one for a wall section, one for a corner of the wall, and one for an alcove that would transport the player to a different minigame. This took a lot of time, since I had particular ideas for how I wanted it to all look and fit together, and it wasn’t easy to get everything to go together right, but eventually I got it the way I wanted.
And then I went to import the models, and I encountered some further issues. Some of the models I’d used were obsolete (such as piece 702, the brick 4 x 4 corner), and I had to replace them in Studio. Not all the colors allowed by Studio were available in the Unity package, and in particular a “metallic gold” color I had used wasn’t recognized, so I had to swap those pieces to a different color. The Unity package did include a “warm gold” color, but I couldn’t find that in Studio, until the Brickipedia page on the LEGO color palette came to the rescue—apparently the color that had “warm gold” as its official LEGO name had the common name of “pearl gold”, and the Unity package used the official names while Studio used the common names. The biggest issue I had in the import, though, was that some of the pieces were offset. I thought I might have made a mistake in Studio, or there was a problem with Studio’s exporting the LDraw format, but no, I’m pretty sure the issue was in the import. It only happened with one specific kind of piece (piece 2476, plate, modified 2 x 2 with pin on bottom); my best guess is that this piece has its origin point set differently in the Unity LEGO package than in the LDraw format, so when the models were imported into Unity it interpreted their position differently. In any case, it wasn’t a big issue to manually reposition those pieces in Unity after importing the models, though as it happened I’d used a lot of those pieces, so it did take a while. Still, eventually I got all the parts to my lobby imported and positioned—the Brick Building mode didn’t recognize that pins were supposed to snap into sockets, so I had to position the pieces manually, but that wasn’t too big a deal. My lobby was complete. (And if I do ever get around to making my own minigames and want to add them, I can just swap out one of the wall sections for a new alcove; I intentionally left plenty of room for expansion.)
Then came the programming. I had to implement the character model change, and, more difficultly, the level change. I won’t go into details about the process, except to say that in working all this out I ended up learning a lot about the Unity SceneManager and the DontDestroyOnLoad function. Oh… and I learned one other thing. I’d been for some time kind of lamenting the fact that Unity didn’t have a way to lock objects and prevent them from being accidentally selected like in Blender and some other applications. Turns out it does—you can click on a hand icon to the left of the object’s name in the hierarchy—it just hadn’t been mentioned in any of the Unity courses I’d taken. Wish I’d known about that sooner. But anyway, after a lot of work, the lobby was complete and functional.
With all the time I put into these models, I’m thinking of putting them up for free on the Asset Store—I don’t know whether anyone else would be interested in using them, but, eh, couldn’t hurt. Of course, I’ve never put anything upon the Asset Store before, and I don’t know how to do it, but I’m sure I could figure it out.
You can play my finished Microgame here (provisionally finished; as I said, I might add more minigames)—although it’s bulky enough it may be a bit clunky to play the WebGL version online, so I’ve also made a Windows build available.
So anyway, in summary, the Unity LEGO Microgame definitely did not disappoint. I got… way too into this. Like all the Microgames, it’s a good starting point to learning how to use the Unity editor, but I’d also recommend it to anyone who wants to see the new LEGO packages in action.
2 replies on “A Look at the Unity LEGO Microgame”
Thanks, great article. You did get carried away! But we readers are more enlightened for it.
I’m pretty jazzed about the Unity/Legos partnership. In particular, I’d love to see the robotic pieces from Mindstorm available, not just the bricks, but the gears and motors and struts.
Unity’s animation features are something I haven’t played with yet, but I hope to find a tutorial with how to do a Lego video with Unity. In many ways, it should be much easier than a traditional animated video (or stop-motion Lego movie).
Thanks for the comment! (And sorry to leave it so long in moderation… as I said in my most recent post, I just started a new job, and unfortunately haven’t had time to check on my blog). Yeah, I agree; having the robotic pieces available would definitely be nice… but who knows what might happen in the future?