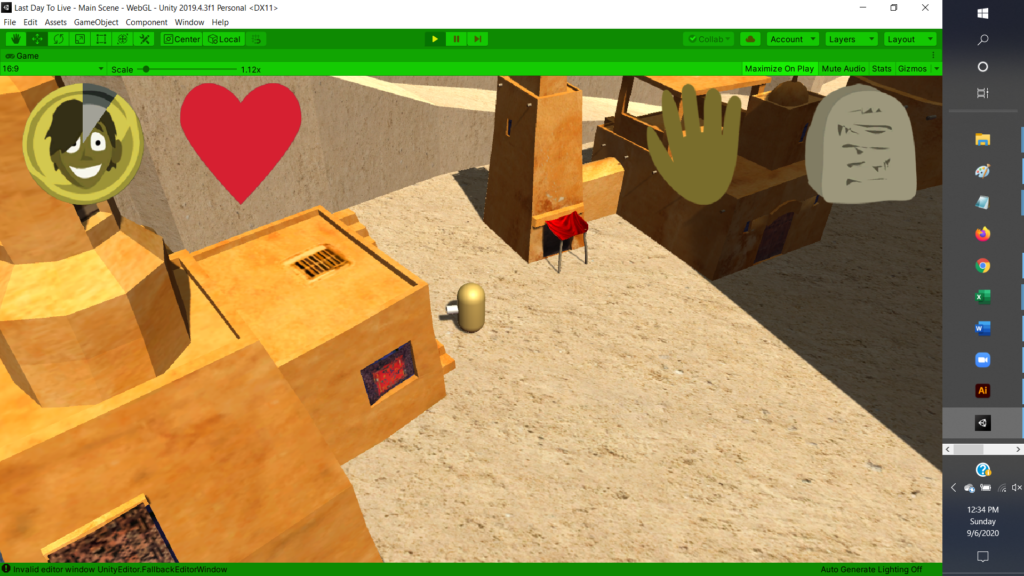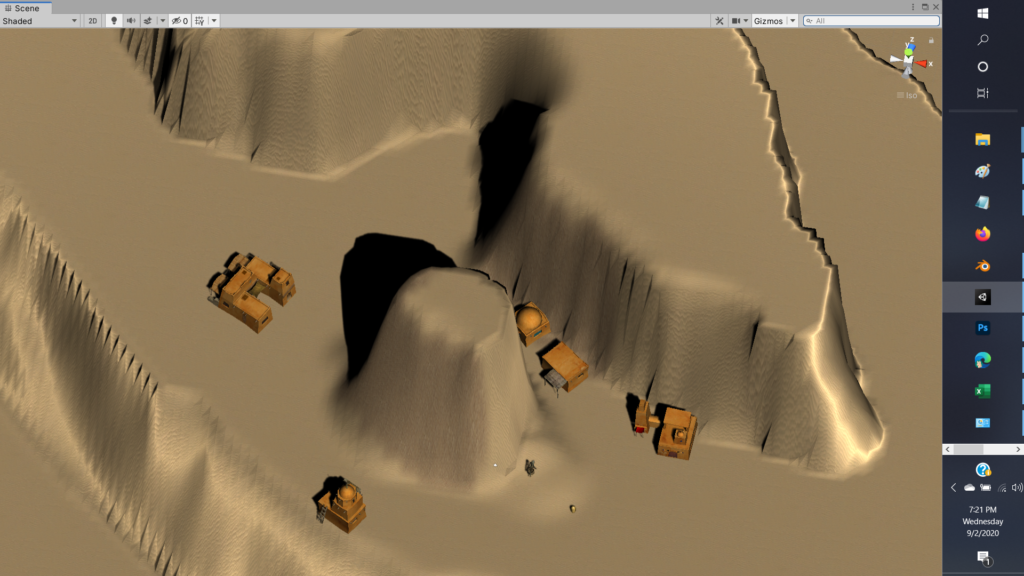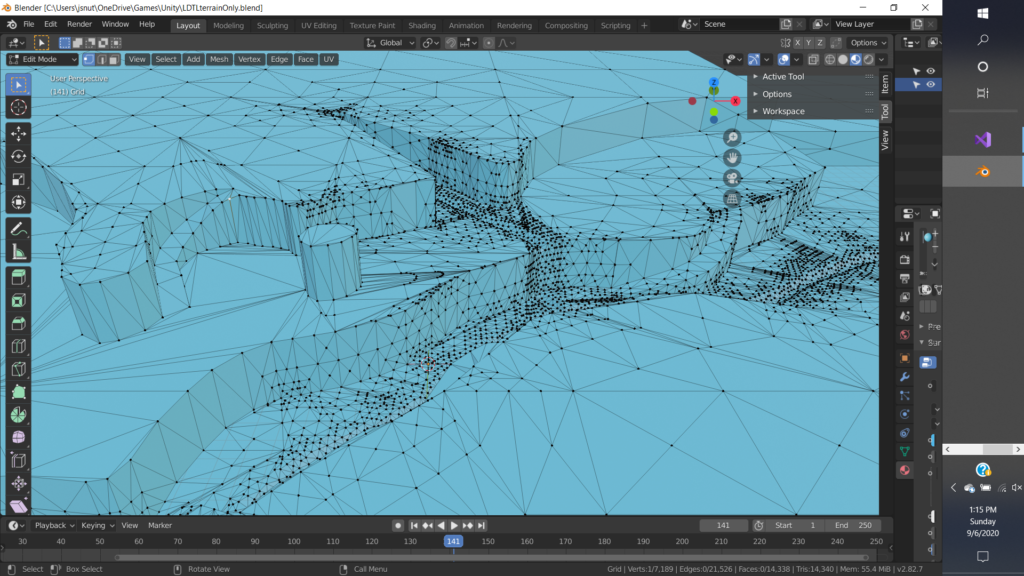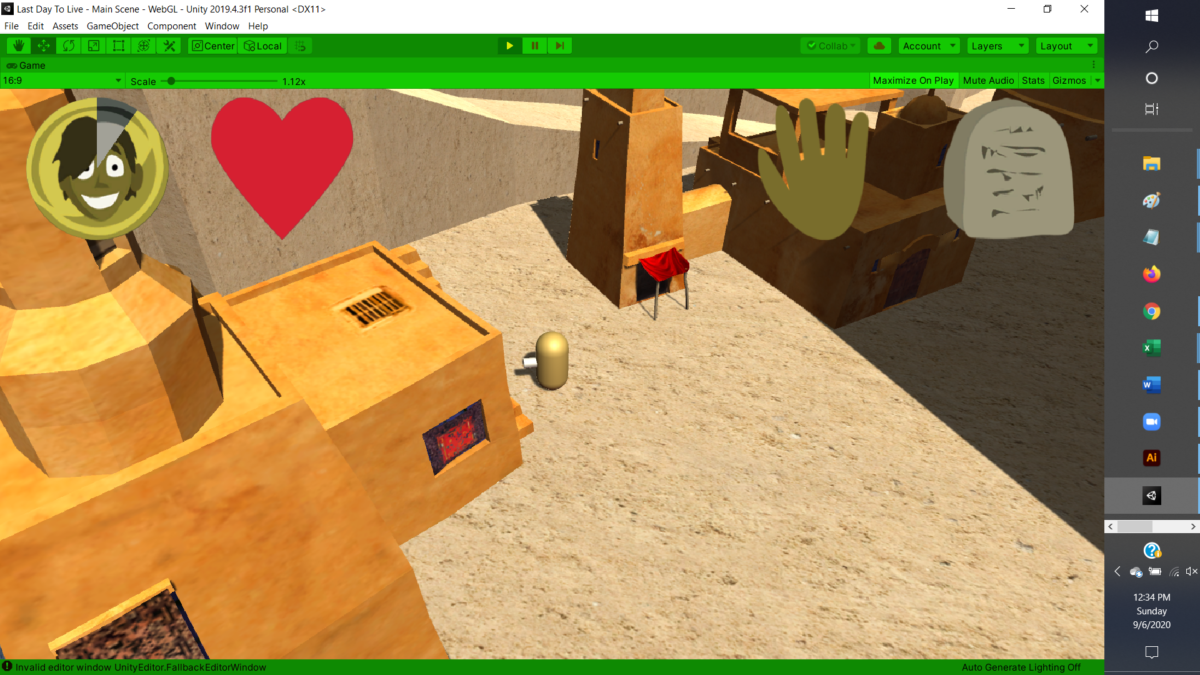
So I have hitherto been making one post a week about my progress on Last Day to Live, but here in the final week of the Create with Code Live course I figured I’d split things up into two… largely because I’m at a point where I have some visually distinctive images to show, since I’ve finally started replacing the simple primitives I initially used to block the game out with assets from the Unity Asset Store.
The buildings in the screenshot come from the Arabian Village package by gameprops.fr. Or possibly gameprops.net—the asset store publisher page shows both URLs, but they now both lead to 404 errors, so unfortunately the company apparently is no longer active. Although it’s not shown here, I’ve also decided on an asset to use for the enemies (well, the final game will of course have many types of enemies, but I may only get to one in time for the Graduation Play-a-thon): the Meshtint Free Polygonal Metalon by Meshtint Studio. Honestly, I’d been thinking of any assets I used from the Asset Store as temporary placeholders until I got around to creating my own assets for the game, but… it’s probably not realistic to think I can create an entire game’s worth of assets by myself (at least, not for a game with the scope of what I eventually hope for this to be). I probably am going to have to use some premade assets in the final game, and I think I like both these assets enough that they’re probably going to make it in.
I am going to create some assets of my own, though, and in fact I ended up having to create one asset I hadn’t really been expecting to. I’d been planning on using Unity’s built-in Terrain system for the game’s, well, terrain. But when I went to actually shape the terrain to match my plans, I encountered a problem. The terrain system works very well for relatively gently sloping hills and mountains, but I wanted to have a lot of cliffs, and it turns out that because of the way the Terrain system works it’s not at all well suited for cliffs. No matter how much I tried to refine them, my “cliffs” ended up much more sloped and less abrupt than I wanted, and more jagged at the edges.

If I wanted the landscape the way I’d envisioned it, it seemed I wouldn’t be able to use the Terrain system. I’d have to make it in Blender. And so I did. What I have so far definitely isn’t final; I’m going to add more detail, make the flat parts somewhat hilly and irregular, and increase the resolution a bit, and of course expand the area; for now I only modeled a relatively small region. But it’s shaped basically the way I’d planned, with tall cliffs above and below the starting area, and gentler inclines to let the player go up and down the cliffs, and I’m pretty happy with how it’s looking so far.

Of course, one advantage of the Terrain system is the texture painting, which I couldn’t do so easily with my Blender model. For now the terrain just uses a uniform sandy texture, but I think there are ways to do texture painting without the Terrain system, and I may look into that so I can vary the textures of the terrains a little. At the very least, I can give the cliffs a different texture from the horizontal areas—that I definitely know how to do; I just haven’t put in the time to do it yet.
Oh—in putting together the game map, there’s one more asset from the Asset Store I used. There are a few places I wanted to include bridges to allow the player to get over chasms and rivers, and for those I used the Modular Wooden Bridge Tiles by Laxer. Just to credit all my sources.
So I’d intended to focus this week mostly on putting non-primitive models in the game—both assets from the asset store, and models I created myself. And I guess that’s what I mostly focused on, but I did do a few other things. One minor change was that I tweaked the lighting a bit to have more ambient light, because the shadows cast by the cliffs were far too dark. But as I went I also made a list of other relatively high-priority changes I wanted to make—relatively high-priority because they were a lower priority than getting the models in, but they were things I still wanted to do before the Graduation Play-a-thon if time permitted. And here’s where the list last stood, as I’d written it:
- Ooh… stop timer during dialogue!!!?
- And of course make it so where you CLICK matters, not where you RELEASE.
- Increase raycast distance for navigation?
- Add colliders to buildings
- Add water
- Make dialogue boxes smaller
- Hm… check if cursor is over a NavMesh?
Most of these items would involve some scripting, or at least changing variables in the scripts—the only two that didn’t were adding colliders to the buildings and adding water. Regarding the former, the Arabian Village assets did not come with colliders, so as it stands the player can walk right through the buildings, which obviously isn’t desirable behavior. I think the buildings’ shapes are blocky enough I can get away with just giving them some simple box colliders (though some of the buildings will require more than one box collider), and that’s easy to do; I just haven’t done it yet. (Ah… and I’ll also want to mark the buildings as Nav Mesh Obstacles for navigation purposes. Again, easy enough to do; I’ve just been busy with other things and haven’t done it yet.) Regarding the latter, well, the game is set in a desert environment, and there isn’t much water, but the part of the map I’ve created so far does have a few channels that are supposed to be rivers, and right now there’s no water in them. I may or may not have time to put some in before the Graduation Play-a-thon—though there’s also one spot where there’s supposed to be a small waterfall, and that I’m afraid I’m definitely not going to have time to put in before the Graduation Play-a-thon, seeing as I don’t have any idea how to make a waterfall—I’m sure I can figure it out, but it’ll take time, of which I don’t have an abundance at this point. (Oh, and at some point I’ll also want to figure out how to remove the riverbeds from the NavMesh so the player doesn’t walk through the rivers when navigating.)
The other five items in the list, though, all require some measure of scripting. And I figured I’d tackle them after I’d put in models for at least the enemies, player, and NPCs. But then last night I was procrastinating going to bed for no good reason, and figured I’d go ahead and take a stab at addressing these issues. And… they turned out to be much easier to do than I expected, or maybe I’m just getting better at figuring out how to do things in Unity. In any case, I managed to take care of four of those five items on my to-do list last night, and they only took me a few minutes each.
(The one that I didn’t do was the “Make dialogue boxes smaller”—as I mentioned in the last post, right now the dialogue boxes take up so much space that there won’t be room for them if I have longer bits of dialogue, or more than two player options, so I need to reduce them to a more manageable size. That won’t be hard to do, though, and I think that’s something I can definitely get done before the Graduation Play-a-thon.)
I’m going to briefly go over each of these items, just I guess as examples of Unity problem-solving, or in case anyone’s curious about them.
“Ooh… stop timer during dialogue!!!?”:
Yes, when I wrote this in my notes to myself, I included the “Ooh…”, and I ended it with three exclamation points and a question mark. I… I don’t know why. Sorry. Anyway, so as previously described the player has a time limit in the game before being killed by the curse, and the icon in the lower left shows how much time remains. But that time was always running while the game was in progress, and it occurred to me that that’s not really the way it should be: for instance, it wasn’t really fair to have the time still going down during a conversation with an NPC. Well, this wasn’t a hard fix. I added a public boolean “gamePaused” variable to the GameManager script, and then went into the PlayerTalkState script and had it set gamePaused to true when the player started a conversation, and to false in the LeaveState method that was called when the player left the Talk state (which would occur at the end of a conversation). Then I had to modify the working of the timer in the UIController script, which as originally implemented kept track of the time since the game started (or since its last restart), by subtracting the start time from the current time (Time.time). Now, instead, the script keeps track of the elapsed time starting at zero, and in the Update method it adds Time.deltaTime to the elapsed time only if gamePaused is false.
(Memo to self: It is a dumb idea to have two different scripts called “UIController” and “UIHandler”. You will not remember which script does what.)
Of course, this method of pausing the timer during conversations has the advantage of being extensible later to other applications, both if I want to have the game paused by other things than conversation (for instance, I’ll probably want to pause the game while the inventory window is open, too, once I get around to implementing that) and if I want to have other things put on hold when the game is paused (for instance, I’ll probably want to not have enemies attack during conversations—which they currently can, though once I put everything in its intended position there shouldn’t be any enemies close enough to NPCs to make that likely to matter for now).
And of course make it so where you CLICK matters, not where you RELEASE:
I used all caps here because I make my notes to myself in a text file, so formatting like italics and boldface is not available. I don’t in general split up notes into different text files for different projects; I just keep all my notes for almost everything together in one gigantic text file, only creating a new such file for my notes at irregular intervals averaging maybe once a year or so. My organizational methods probably leave much to be desired. (Related: I often have thousands of tabs open in my browser, for pages I might want to look back at later. Why don’t I just use bookmarks? I don’t know. I really should. I’m going to try to start.)
Anyway, this is another issue I mentioned in the last post: because of the way the click to navigate/attack/interact, click and hold to move directly system was originally implemented, the game would check where the mouse cursor was when the button was released, not when it was pressed, which sometimes made it harder than it had to be to click on a target. Well, this wasn’t a hard fix either. Originally, the Update function of the PlayerMoveState script checked whether the mouse button was released (using Input.GetMouseButtonUp) and then, if the time since the mouse button was pressed was less than 0.5 seconds (a value that was of course stored as a variable so I could easily change it if I wanted to), it performed a raycast to see what the mouse cursor was over, and reacted appropriately (changing to the Attack state if the cursor was over an enemy, to the Nav state if over a walkable mesh, etc.) Well, all I had to do was move the raycast code to the EnterState method that was called when the Move state was first entered, and have it store the relevant hit information in variables—one for the GameObject that was hit, and one for the location where the hit occurred. Then, when the Update script detects the mouse button released, it just reacts based on the tag of the stored GameObject.
At first, this seemed to break the navigation system for some reason: when I clicked on a part of a navigable mesh, the player no longer navigated there, but instead moved to some much closer point. Oddly, the player would still navigate properly to enemies and NPCs when they were clicked on. This problem turned out to be for a deeply stupid reason: I had used the same variable both to store the location where the raycast hit occurred (which was the location the player should navigate to if subsequently entering the Nav state) and to store the location the player would move toward when the mouse button was held down, forgetting that this meant that if the player started to move even slightly before the mouse button was released then the location to navigate to would be overwritten by the other use of the variable. All I had to do was separate these two values into different variables, and all was well.
Though while I was at it I decided there was one other related detail I also wanted to fix. That the player started to move as soon as the mouse button was pressed was occasionally problematic; for instance, if the player was standing at the edge of a cliff and I wanted to navigate to some spot below, then if I tried to click on the spot the player would start moving as soon as the mouse button was pressed and would plummet off the cliff. I thought maybe it would be best to have a slight pause after the mouse button was pressed before the player started moving, in case the player was only intending to click to navigate and didn’t want to move directly. Pausing the full 0.5 seconds—the maximum time between press and release to count as a single click—seemed to make the player seem unreactive, so I created a second variable for the delay before the beginning of movement—I settled on 0.2 seconds for now—and just had the Update function only proceed to movement if the elapsed time since the mouse button was pressed was greater than that. I think that’s making the controls work much better now than they were before.
Increase raycast distance for navigation?
So my code for changing the mouse cursor and the player’s actions depending on what object the cursor was over was more or less taken directly from the Getting Started project in the Unity Learn Beginner Fundamentals course, and I’m not going to go over it in detail here; you can look over that project if you’re interested. The relevant detail, though, is that the MouseManager script performs a raycast to see what object the mouse cursor is over, and changes the cursor based on that result (more specifically, on the object’s tag): a Move cursor if it’s over a walkable mesh, an Attack cursor if it’s over an enemy, and so on. But the raycast, as originally implemented, only extended to a maximum distance of 50 units, which meant that if the cursor was over an object farther away than that, it would show the null cursor (in Last Day to Live just a shrugging figure), which was meant to indicate that there was nothing there to click on. But this was less than ideal, because in fact there could be something there to click on; you could navigate to surfaces more than 50 units away, for instance, despite the cursor seemingly indicating you couldn’t.
Anyway, this was a very easy fix. That maximum distance was stored as a variable, so all I had to do was increase its value from 50 to 500 and voilà.
Hm… check if cursor is over a NavMesh?
This, on the other hand, I thought might be significantly harder. The cursor would change to the walk cursor whenever it was over a mesh with the Walkable tag—even if it was over a part of that mesh that wasn’t walkable, like, say, a vertical cliff face. I thought it would be better if it would change to that cursor only if it was over a part of the mesh that the player could actually walk on. Was there a way to detect whether the part of the mesh the cursor was over had a NavMesh attached?
As it turned out, yes, and it was much easier than I expected. I found the solution by just reading over the documentation of the NavMesh class and seeing if there was anything that looked like it would help. And there was—a method called SamplePosition that found the closest point on a NavMesh within a specified range—or returned false if no such point was found. All I had to do was call SamplePosition to see if there was a NavMesh within some short distance of the point on the mesh that the cursor was over (I used a sample distance of 0.2, but that was an arbitrary choice), and I could set the cursor to the move cursor if there was, and the null cursor if there wasn’t.
(This technique, by the way, I’ve found useful many times when I didn’t know how to do something, and I’d recommend it to other Unity beginners who aren’t sure how to do something. Just browse the page in the Unity Scripting Reference for a class related to what you’re trying to do. I’ve found that in doing this I often run across a method that provides exactly what I need.)
There was only one slight complication. I wanted this to affect not only the cursor, but the behavior on a mouse click, too; I wanted the player to navigate toward the location if the mouse was clicked on a walkable area, but not if it was clicked on a non-navigable part of the mesh. Okay, all I had to do was add a call to SamplePosition in the appropriate part of the Update method of the PlayerMoveState script, too, setting the player’s state to the Nav state if the player had clicked on a navigable part of the mesh or the Idle state if not. So far so good, but that meant I’d be using that sample distance in that script as well, and the PlayerMoveState script didn’t have a reference to the MouseManager script (nor did it have any reason to). At first I just put another variable to hold the sample distance in the PlayerMoveState, with a comment remarking that the value should be kept the same as the variable of the same name in the MouseManager script, but that was obviously inelegant and messy. What I ended up doing instead was just making the navMeshTestDistance variable in the MouseManager script static, so I could refer to it in the PlayerMoveState script without needing a reference to a particular instance of the MouseManager; that way I could keep the variable in one place while still being able to easily use it elsewhere.
So, anyway, that’s what I’ve accomplished so far on Last Day to Live. But there are still a few big things I want to get done before the Graduation Play-a-thon. Most importantly, you might notice from the screenshot at the top of this post that while the environment looks better now, with sandy cliffs and scenic buildings, the player itself is still just a brown capsule with a cylinder stuck on front to show the way it’s facing. So my next step is going to be to fix that: to replace those primitives with a model for the player. And, as I mentioned in the last post, I couldn’t find an asset in the Asset Store that was really close to what I wanted the player to look like (at least, not on my current budget), so I was going to try to make my own model for the player, using this tutorial as a guide. So… I guess that’s my next step. Here goes nothing…
EDITED LATER TO ADD: Oops! I almost forgot! If you (for some reason) want to play the latest build of the in-progress game, you can play it online here. (With these assets added, though, it’s starting to get a bit large for a WebGL build…)
